| |
 |
Square it Up!
Introducing the latest innovation in workroom tools. Originally designed for drafting point-to-point swag patterns, the Square it Up! is already finding other uses in the workroom:
Framing fabric motifs for pillows and flat valance faces
Marking shade rings
Ensuring that shades are hanging square.
Plus many other uses
Made in the USA !!
|
Easily Draft a Pattern for a Point-to-Point Swag:
The Point-to-Point swag, also known as a Necklace Swag or Drapery Swag, is one of the most versatile swag styles. It can be specified to any shape or size, casual or formal, stand alone or paired with panels, horns and cascades. Explore the beauty and versatility of the point-to-point swag here and learn how to utilize the point-to-point swag to give your designs a truly unique and custom look.
The PTP swag pattern is unique in that it requires that all four corners of the pattern form right angles. Regardless of the size or shape of the swag, forcing the square corners enables the swag to pleat and fall into perfect graceful folds every time and helps control the bulk at the pleat stack.
The Professional Workroom Handbook of Swags, Volume 1, has excellent step-by-step instructions for defining the finished dimensions of the swag, calculating the pattern dimensions, clamping rulers to force the right corners and tracing the pattern. It is a very effective methodology, but a bit clumsy to execute.
The Square it Up! drafting tool now makes it extremely easy to draft a point-to-point swag pattern. Order your Square it Up! tool today. Instructions for using the Square it Up! follow below.
|
| |
|
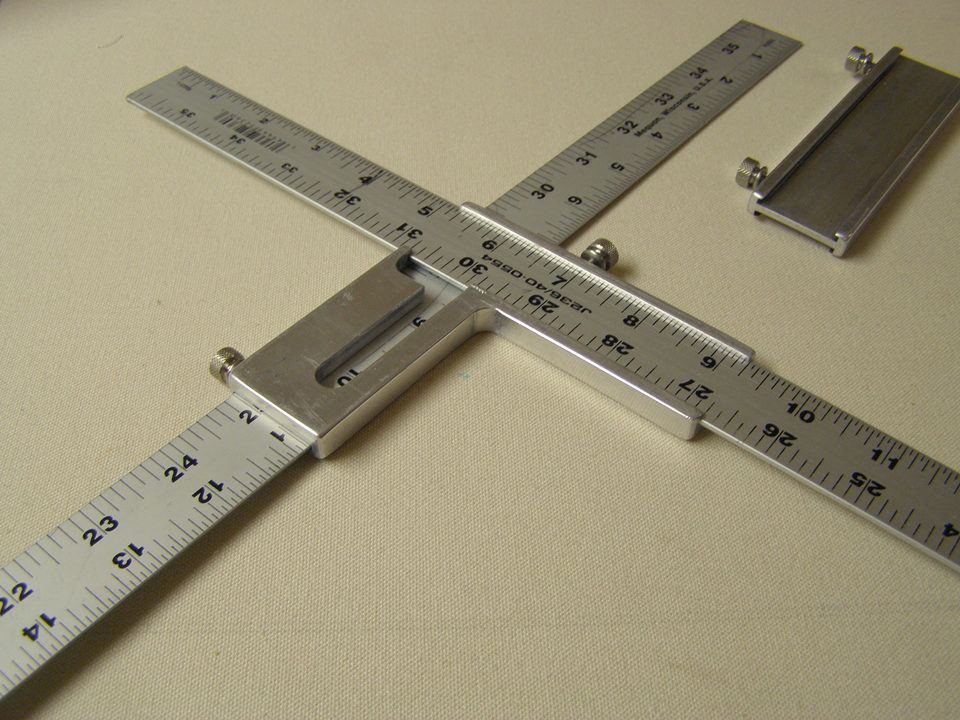
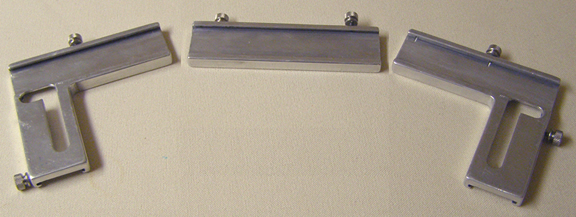
The Square it Up! tool consists of two corner units and a straight unit.
|
 |
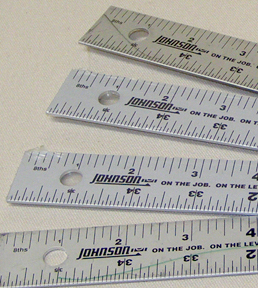
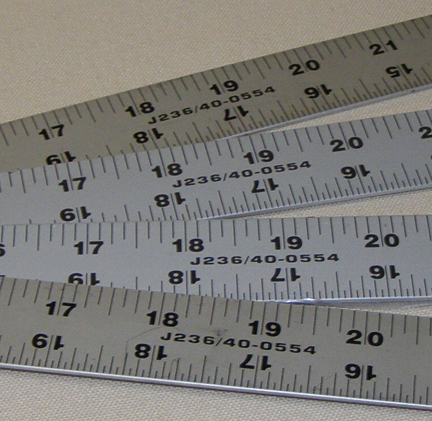
To use the Square it Up! swag drafting tool, you will need four yardsticks. They must be aluminum yardsticks, 36" long by 1 1/8" wide and stamped with Johnson J236. These yardsticks are available at your local Home Depot in the tool department. They are also available at various on-line sources. You can also order them with the Square it Up! tool here in the Sew Easy Windows book store.
|
|
Note: The Square it Up! does NOT replace your Parkhill, Rowley swag templates or other professional patterns for standard swags. It is used specificially to draft point-to-point swag styles..
|
|
Draft a Point-to-Point Swag Pattern using the Square it Up! Drafting Tool:
Easy Steps - Spectacular Results
Quick tips for design:
- Try to avoid shallow cutouts at the top of this swag.
- The methodolgy for drawing this pattern will shorten the cutout by an inch or two, so be sure to drape it a little longer than you wish.
- A shallow cutout pulls the top line of the swag up. The shallower it is, the less the first fold will fold back.
- Especially on wide swags, try to make the cutout at least 8-10" deep
- Calculating fullness
- These swags do not require a lot of fullness. Usually 2x or less.
- Calculate the fullness based on the body of the swag (between the cutout and the bottom curve), and not on the full finished length.
- Cutting
- If working with a fabric with a pattern, center the most color and pattern just slightly above the center point of the pattern. This will place the most color and interest at the center of the swag.
|
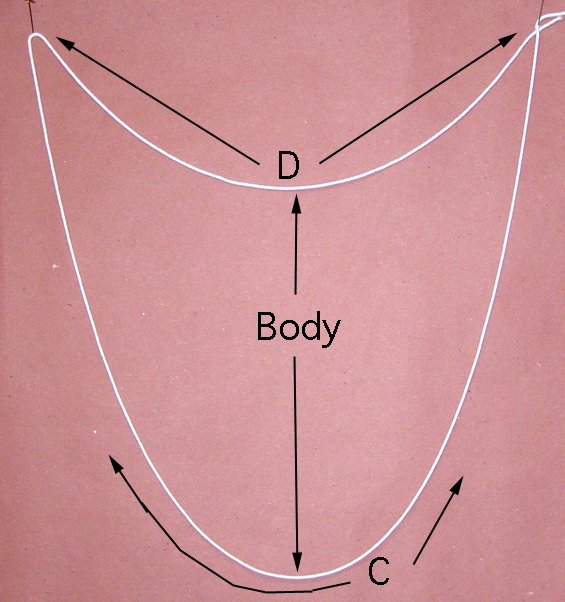
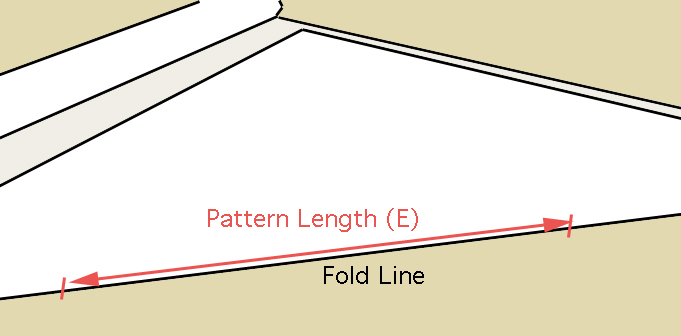
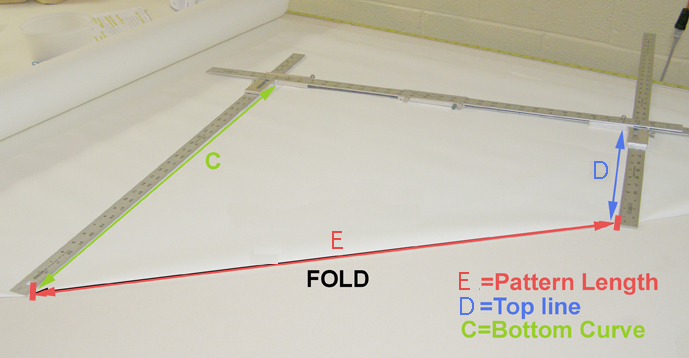
This is the basic point-to-point swag pattern shape. All four corners must form right angles.
The top line D is the top line of the swag. The bottom curve C is the bottom swoop of the swag. The pattern length E is the fullness of the swag.
|
|
To calculate your pattern dimensions, drape weight chain on the wall simulating the desired finished dimensions of the swag.
Measure the chain which simulates the top line. This is measure D on the pattern. Add 2-3" to this measure, depending on the finished width of the swag. Narrower swag, 2" - Wide swag, 3". If in doubt, add the higher number, it can be cut away later.
Measure the chain which simulates the bottom curve. This is measure C on the pattern.
Measure the body of the swag between the two chains in the center of the swag. Calculate pattern length E by multiplying this measure by the desired swag fullness. Usually 1.5 or 2 is sufficient fullness for a point-to-point swag.
|
|
Fold the pattern fabric in half - either straight or on the bias. Note that you draw 1/2 the pattern on the fold. This ensures a perfectly symmetrical pattern when cut.
On the fold line of the pattern fabric, mark the pattern length (E). This is usually 1.5-2x the body length of the finished swag.
|
|
Lock a ruler into one of the corner units at one-half the top line (D) measure. The measure should be right at the inside corner of the unit.
Lock a second ruler into the other corner unit at one-half the bottom curve (C) measure. The measure should be right at the inside corner of the unit.
|
|
Insert rulers across the top channels of both corner units and connect them with the straight unit. Do not lock these rulers tight.
Place the rulers on the pattern fabric. Align the ends of the rulers with your marks on the pattern folds.
|
|
|
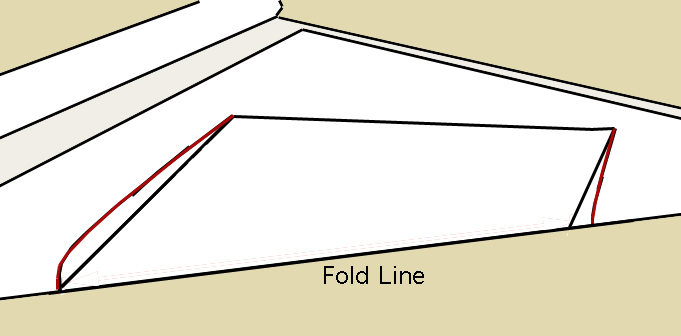
Trace the inside of the pattern. Remove the rulers, shape the top and bottom curves (red lines show shaping).
Your shaping of the top line should be about 3" above the top line drawn with the pattern. This rounds out the top line and removes the sharp triangular tip. It also shortens the cutout.
Your shaping of the bottom curve is simply to remove the point at the center bottom. Arch gently out from the pattern line. If you arch too much, it is easy to trim away and shape the bottom fold when you pleat and hang the pattern.
|
|
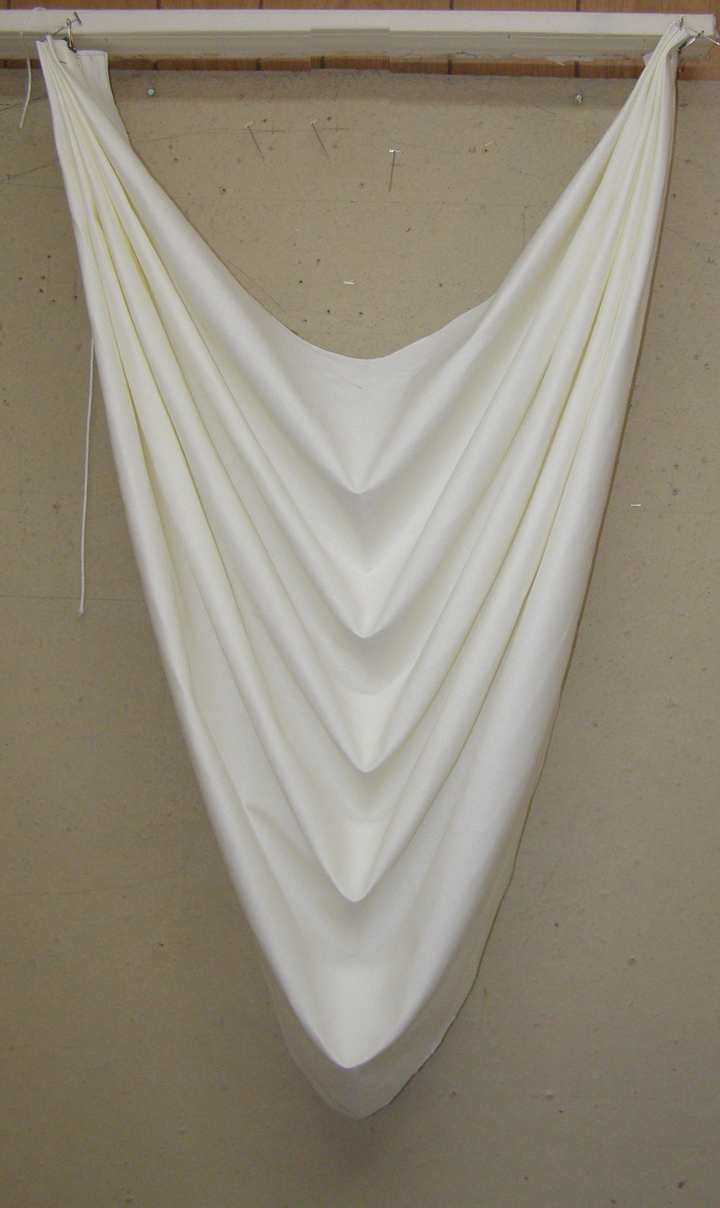
Stack pleat the sides of the pattern, clamp with binder clips and hang from hooks on the wall.
Dress down the folds. If the bottom fold is too large or the sides of the outside fold too large, then simply trim to shape with scissors.
If the bottom fold is too small or the outside fold too narrow, simply pin or staple a strip of fabric to the edge of the swag and trim to shape.
|
|
|
Other Uses:
|
|
|
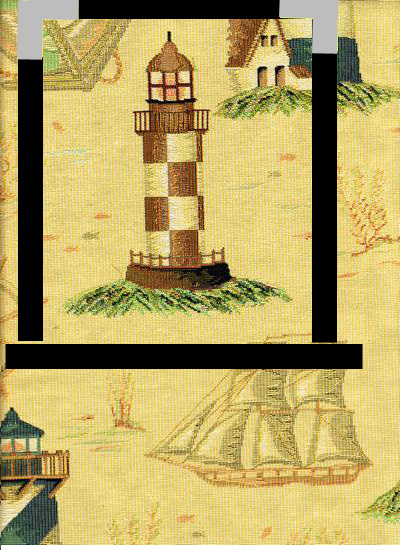
Frame fabric motifs for pillows, flat valances and other similar treatments.
Lock three rulers in a square or rectangular shape to enable you to 'frame' the fabric motif for a pillow or valance face. Place the fourth ruler at the bottom of the side rulers to finish the frame.Place on the fabric and slide the square around until you find a desirable 'picture' for your treatment. Mark the four corners and/or the center of the picture.
Or, purchase two sets of Square it Up! and have four corner pieces on hand for framing.
|
|
 |
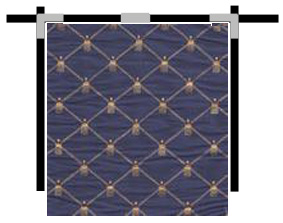
Ensure your shade is hanging square.
Fabricate your shade. Use push pins or tacks to secure it to the mount board.
Using the corner pieces of Square it Up!, lock 3-4 rulers together in an inverted "U" shape slightly wider than your board width. The straight piece will allow you to lock two rulers across the top for a wide shade.
Verify that your board is mounted level. Place the rulers on the top of the board, allowing the side rulers to hang down along the sides of the shade. The corner pieces sit evenly on the bulk at the corners of the shade, ensuring that the entire square is hanging square to the board.
Verify that the shade is hanging square. The sides of the shade should be parallel to the edges of the rulers.
|
|
 |
| |
Care & Storage of the Square it Up! tool:
|
|
Spritz a scrap of interlining lightly with drapery silicone spray periodically to wipe it down. The silicone spray will clean and lubricate - enabling aluminum yardsticks to slide smoothly through.
If the aluminum yardsticks catch when inserting or sliding through the units, use a very fine metal file to smooth away small nicks on the yardsticks. The units are designed to hold the yardsticks securely. Sometimes, a small nick will prevent the ruler from sliding easily.
To store, you can remove the three unit pieces and store on a shelf, leaving the yardsticks available for other jobs. Or, leave one yardstick anchored to each corner unit and the two cross-yardsticks anchored in the straight unit. Store on a shelf or on hooks to grab easily. You will only have to insert the two cross yardsticks in to the corner units as preparation to drafting another pattern.
|
|
| |
|
Order your Square it Up! tool and four rulers from the Sew Easy Windows Book Store.
|